Hard water contains high levels of calcium and magnesium, which causes limescale buildup in pipes and appliances and interfere with soap’s ability to clean. For some people, a water softener is a vital household appliance that removes the minerals causing water hardness. Water softeners can last up to 20 years, but to keep them working efficiently, regular maintenance is required.
Thankfully, water softeners are relatively low-key after they are installed and working. They just hum along and do their job, but there are a few easy ways to ensure your water softener works to its fullest capacity.
Water Softener Maintenance Guide
Water softener maintenance is simple and could save a lot of time and money on possible repairs later. Whether you have a brand new water softener or you want to keep your current one running well, follow these tips to keep your water softener in top shape:
Pre-Tip: Read your Water Softener’s Manual
Before you do anything, read your water softener company’s manual to see specific recommendations for your system. Don’t rely on Google or Siri, as they can’t tell you what your manual can. Your manual will let you know what type of salt to use, how often to clean your system, and provide you with the information you should know in keeping your water softener well maintained.
Tip #1: Check your System’s Salt Levels
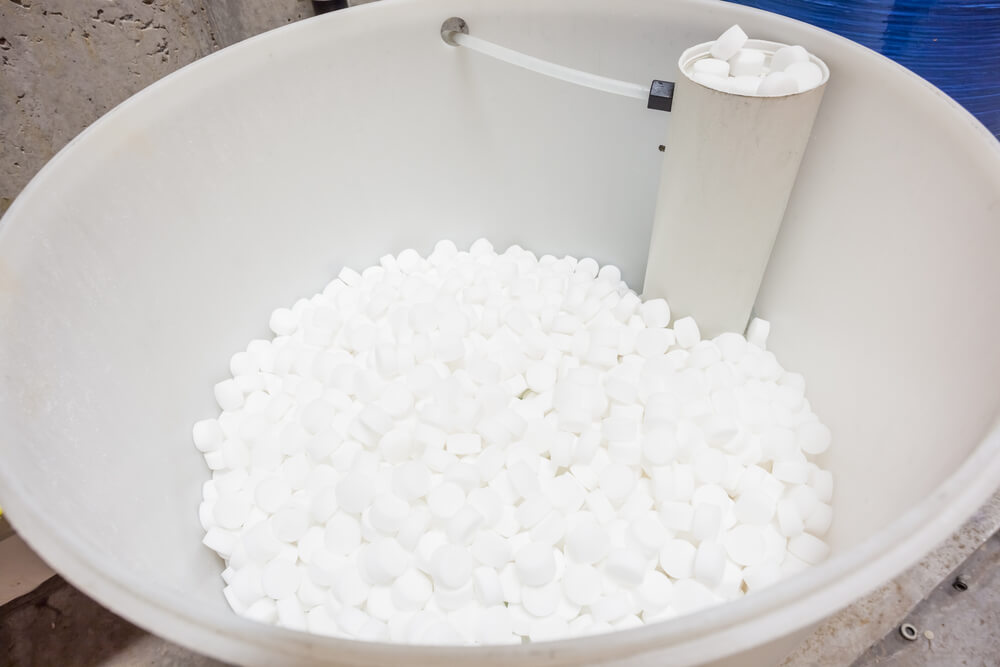
It’s important to check your softener’s salt levels at least every 4-6 weeks or more frequently if you have high levels of hard water minerals.
Your salt is in the brine tank, and this is where the softening action occurs. The sodium ions “swap” with magnesium and calcium through the ion exchange process.
If your salt level is too low, your softener won’t be able to soften water, so this is an important tip.
To check your water softener’s salt levels, lift the lid to the brine tank. The salt pellets should be high enough to cover any visible water in the tank. If the salt is low, refill the tank to no more than 2/3 full. Make sure not to overfill the tank with salt. A good rule of thumb is to ensure the salt is at least three inches above the water line.
This is also the time to talk about quality salt. There are three types of water softener salt: rock, solar, and evaporated. Standard rock salt may be less expensive, but it is not the best choice because it contains more insoluble minerals that can result in not only decreased softening capabilities but a muddy tank that you will need to clean more often than you like.
Solar salt, commonly called “sea salt,” comes from evaporated seawater. Solar salt is 99.6% pure and more soluble than rock salt, meaning it will dissolve faster.
Evaporated salt is made from mining and evaporation, and at 99.9% sodium chloride, it is the purest option. Evaporated salt is more expensive, but it is the most highly effective at treating hard water.
Water softener salt prices range from $5 to $35 per 40-bag bag. Most people use 1-2 bags per month, depending on water hardness levels, household size, and tank capacity.
Consult your water softener’s manual for the recommended salt for your specific product. Pure salt with iron remover is a good choice. High-quality salts will leave the storage tank with less residue and lower the likelihood of salt bridges and salt mushing.
If you notice signs of hard water, like cloudy films on your glassware or soap that won’t lather, that may mean your salt level has fallen too low.
Tip# 2: Clean your Brine Tank Yearly
Most water softener experts recommend cleaning your brine tank once per year. If you don’t clean it regularly, salt can form into sludge, which is a huge mess to clean up (more on that in a bit).
To clean your brine tank, you will need a place to dump the brine from the tank, like a pit or gravel bed in your yard. Put the system in bypass mode, then unplug the softener and disconnect the brine tank from the valve assembly. If possible, take the brine tank outside and dump it in a place that will not harm your yard. If it is too heavy, you may need to either scoop out existing salt or use a wet/dry vacuum to remove it.
Once the tank is empty, disassemble the tank to clean it. You can remove the salt plate and clean it with cold water and dish detergent. Then, make a few liters of dishwashing soap and water, pour it in the tank, and scrub it with a long-handled brush.
Use a water hose to rinse the inside of the tank.
You can then use ¼ cup of household bleach or vinegar for every 4-5 liters of clean water and pour it in the tank and let it sit for 15 minutes. After it sits, scrub it once more with a brush, dump the water, and rinse it out.
Once everything is clean, you need to assemble it back together and connect it to the water lines. Take the system out of “bypass mode,” add five gallons of clean water, and fill the tank with at least two 50-lb bags of salt. Make sure the salt levels always remain a few inches above the water level.
The salt needs time to sit in the brine tank to begin dissolving before regeneration can take place. This usually takes about two hours. If you try to regenerate immediately after adding new salt to the brine tank, the resin may not be completely cleaned.
Cleaning your tank takes some time, but the process is simple once you know what to do, and it will save you money on expensive repairs in the long run. This should only need to be an annual occasion unless you notice buildup, and then you should clean it as needed.
You can also flush your water softener every few months with a quality water softener cleaner. Follow the manufacturer’s instructions on how to use these products. Typically, you just add a specified amount to every 40 lbs. of salt.
Tip #3 Break up Salt Bridges
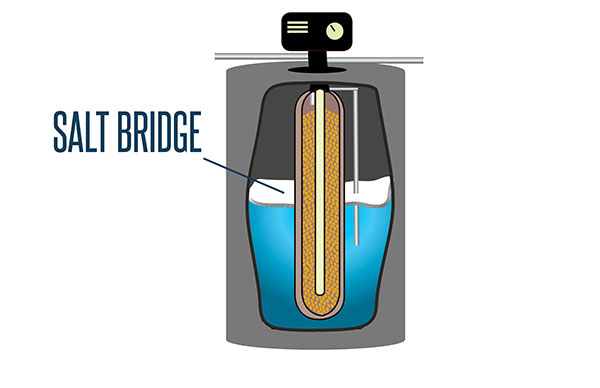
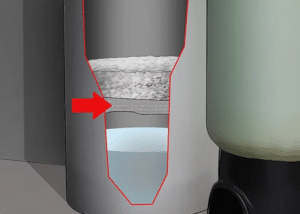
A salt bridge occurs when a hard crust forms in the brine tank, creating an empty space between the water and salt, which prevents the water from dissolving into the water to make the brine. Common causes of bridging include high humidity, temperature changes, or the wrong type of salt.
The best way to test for a salt bridge is to take a broom handle and carefully push on the top of the salt with a little pressure to break it up if it has solidified. If your broom hits something hard that’s not on the bottom or sides of the tank, there’s a salt bridge.
If you find a salt bridge, turn off the water to the water softener, either from the incoming faucet or by using the bypass valve. Using your broom, gently break up the bridge. If it’s not easily breaking, find something sharper and heavier to use. Remove the loose salt pellets from the top by scooping them up with a plastic container.
Vacuum the bottom of the softener with a wet/dry vacuum to remove the water from the tank. Add fresh salt to the tank, filling it no more than 2/3 full. Turn the water back on and add about ten inches of water. Set the water softener to regenerate, and you’re good to go.
Tip #4 Dissolve Mush
Salt mushing happens when the dissolved salt recrystallizes and forms a sludge at the bottom of the brine tank. This thick sludge layer prevents the water softener from cycling through the regeneration process. If you check for a salt bridge, but it doesn’t break up when pushing on it, salt mushing is likely the cause.
To dissolve salt mush, you will need to drain the softener, dig out all the old salt, and replace it with fresh salt. You can follow the steps for cleaning the brine tank for cleaning mush.
Tip #5: Add a Pre-filter if You Don’t Have One
If your water has sediment, iron, clay, sand, or other substances, your water softener could wear down easily without a prefilter. These substances can cause clogs or damages. A pre-filter removes these contaminants before they even reach your water softener.
Your water softener may already have a pre-filter, but if you don’t have one, you should, as it will save you time and money down the road and plus extend your softener’s lifetime.
If you have exceptional plumbing skills, you could add a pre-filter on your own, but if not, you should contact a professional to install one for you.
Tip #6: Know How to Clean Your Resin Tank
You may need to clean out your resin tank if you notice that your water softener is turning your water brown. This signifies excessive iron buildup that manifests in your resin bed. Over time, you will need to rinse the iron out. You can use a resin cleaner like Rust Out to help flush out the iron and other contaminants. Following the cleaner’s labeling instructions for specific details.
Water softener resins typically need to be replaced every 10-15 years, although those that are exposed to high levels of chlorine, iron, or water hardness will need to be replaced sooner. The lifespan of the resin depends on the quality of water it is treating. Some people can replace the resin tank on their own, and others prefer to hire a water softening professional.
Related: Cleaning Water Softeners With Bleach
Tip #7: Schedule a Professional to Service Your Softener
It’s wise to have your water softener professionally serviced every few years. A good water softener can last years without professional attention, especially if you keep up with the maintenance. However, having a professional check your system every 2-3 years will ensure it is working to its greatest capabilities and extend its lifetime.
Frequently Asked Questions
What are some signs that my water softener is malfunctioning?
Here are some signs that something is amiss: crusty pipes, discolored or brown water, soap that doesn’t lather, and/or a change in your water’s taste. These are all effects of hard water, meaning that your water softener is not doing its job by removing the minerals that cause these issues.
In addition, if you notice low water pressure, leaking around the tank, loud noises from the system, or that the system runs constantly or not at all, it’s time to start troubleshooting, because something is not working right.
Learn how to know if your water softener is working properly.
How often does my softener regenerate?
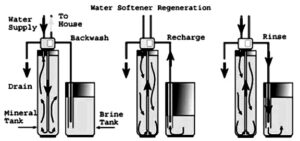
Regeneration, a key process in water softening, is when the system flushes minerals from the resin beads. Without regeneration, those beads would become too heavily immersed with minerals to function properly. The regeneration process relies on the salt that you add to softener to restore them with the sodium they need to do their job.
Some water softeners regenerate on a timed schedule. Roughly once a week, the system will automatically initiate this process, which takes as long as 90 minutes. Most modern softeners allow you to adjust the regeneration intervals.
Also, notice the regeneration patterns. Some systems regenerate more often than others, but there should be some regularity. If your system begins regenerating on an unusual schedule, something may be wrong.
How much does it cost for a professional to service to my water softener?
Typically, an annual service costs between $40-$100; however, that number does not include repairs, if necessary. Water softener repairs, depending on the issue, can cost between $150-$600 on average. Most problems that lead to repairs are ones that you can prevent with regular maintenance: an empty brine tank, a jammed valve, or parts that need cleaned.
The Bottom Line
Following these seven water maintenance tips will ensure that you boost the performance and extend the life of your water softener. If you come across some issues that you can’t fix, always reach out to a water softener professional.
Related Articles:



I have had my Puronics whole house water softener for about 4 years and was told to use Res Care cleaner into the salt well and regenerate the system to help clean the lines and to help keep the system operating well. I was told to pour 1/2 cup and regenerate ,but I have salt in the bucket and was not told how often to add to maintain the softener working well , once a month, every 3 months and can I regenerate by pushing the regenerate button manualy
Hi David, I would recommend contacting Puronics directly to make sure you get the best advice for the particular unit that you have. You can get in touch with them here: https://puronics.com/contact-us/
Thanks for pointing out that the water softener system will be able to extend its life when we have a professional to check them every 2-3 years. With that in mind, I will make sure to look for someone we can trust to also install on in our new house. Our house will be built this year, so we need every professional that we can hire as soon as possible to make sure that the systems we need are placed correctly.